October 10, 2023

Girl Charlee Fabrics + Janome Sewing Tutorial :: Kids Dress Up Hoodie

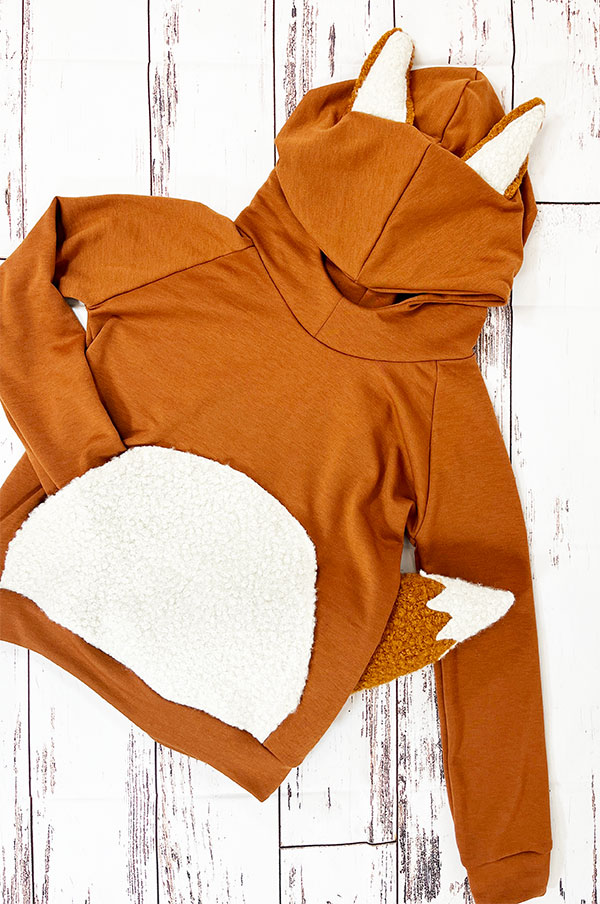
Halloween is right around the corner and I promised my fox-loving niece I would make her something foxy, so today I am going to show you have to easily sew a dress-up hoodie for kids.  I will be using the Mouse House Creations Dress Up Hoodie Sewing Pattern, sweatshirt fleece, my Janome AirThread 2000D serger, and my Janome S9 sewing machine for construction.  Let's get started!

Supplies:
Step 1 – Edit Tail Pattern
Once you have printed and assembled the pattern, to make the fox accessories print the deer ears pattern and the cat tail pattern (follow in instructions).  Before cutting out the cat tail take a pen or pencil widen and curve the sides and draw a zig zag across the tip as shown below.

Step 2 – Cut Out Pattern
Follow the pattern instructions for laying out and cutting out the pattern.  For cutting out the tail pattern cut the whole pattern first on your selected tail fabric and then cut the zig-zag bottom piece of the pattern on your selected fabric as shown.

Step 3 – Attach Front Pocket 
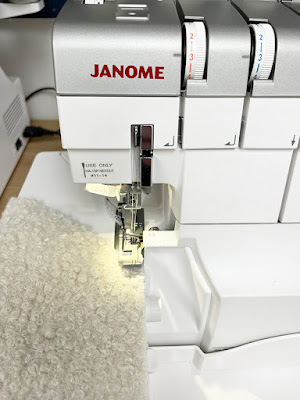
Follow the instructions for attaching the front pocket.  I serged the flaps and then used clips to secure the top and sides to the wrong side as the fabric is bulky and did not require pressing. 
I used a medium zig zag stitch to secure the pocket to the front bottom pattern piece of the hoodie as shown.

Step 4 – Sew Raglan Sleeves 
Follow pattern instructions to sew the raglan sleeves together, taking care to match the sewing pattern notches for the front and back of the sleeve to the front and back pieces correctly.  I serged the sleeves, but you can sew with a regular machine as sweatshirt fleece does not unravel.

Step 5 – Assemble Fox Ears & Tail 
Lay the two earpieces on top of each other with the inside earpiece on top both right side out.  Cut around the inside earpiece to make it smaller than the outside piece (as shown).  Straight stitch around the inner ear to the outer ear leaving the bottom open.  Take your stuffing and gently stuff it into the ears until they are able to stand up on their own.
For the tail piece, lay the zig zag tip on the right side of the bottom of the main tail piece and pin the zig zag and secure the sides.  Straight stitch across the zig zags from end to end.  Take the two tail pieces with the tips attached and lay them right sides together and secure down both ends.  Straight stitch with a long stitch around the tail to the tip leaving the flat tail end open. Turn to right side out and poke out the tip so it makes a point.  Stuff as much as you like.


Step 6 – Assemble Hood
Follow the instructions for assembling the hood option with ears.  Sew the lining pieces first and then insert the ears inside, making sure they are facing the right direction.  Secure the enclosure making sure you are getting the ears in the seam, and then serge/sew the seam closed.


Step 7– Finish Hoodie
Follow the instructions for finishing attaching the hood to the body and then the body of the hoodie with cuffs and waistband, making sure to follow the instructions to attach the tail piece onto the middle of the back body piece when attaching the waistband.


You are done!

We hope you enjoy this tutorial! We love to see what you sew up so please tag us on our social media #girlcharlee #girlcharleefabrics #janome #janomeartisian.

Happy Sewing & Have a Great Halloween!
~ Heather

June 26, 2023

Girl Charlee Fabrics + Janome Sewing Tutorial :: Patriotic Color Block Pencil Skirt


In keeping with the upcoming patriotic summer holidays, I am going to show you how to take my popular Girl Charlee Fabrics Easy Pencil Skirt Sewing Pattern, my Janome serger, my Janome sewing machine, and my Cricut Maker, to transform the patternless self-drafted pencil skirt instructions into a color-blocked sewing pattern and create the Patriotic Color Block Pencil Skirt!

Supplies:


Step 1 – Make Your Pattern
Follow step 1 of the Easy Pencil Skirt Sewing Pattern to determine your skirt measurements.  Take your ruler and pattern paper and draw your skirt rectangle onto the paper.  To create your three color-block pieces just follow the image below.
  1. Mark your waist 3" from the top on the left, and your hem 1 1/4" from the bottom on the left.
  2. Measure the remaining length between those two measurements and divide that amount by 3.
  3. From the waist mark at the top, mark your 1/3 measurement on the left.
  4. From the hem mark at the bottom, mark your 1/3 measurement on the right.
  5. From the waist mark at the top, mark your 1/3 measurement + 2" on the right.
  6. From the hem mark at the bottom, mark your 1/3 measurement + 2" on the left.
With your ruler and pen/pencil, draw a line from the 1/3 measurement on the top left to the first 1/3 measurement + 2" on the right.  Then draw a line from the remaining 1/2 measurement on the right to the 1/3 measurement + 2" on the left.
Follow the pencil skirt instructions to create your tapers on the top and bottom of the pattern, then cut along your drawn lines with your scissors to create your three pattern pieces!
Step 2 – Cut Your Fabrics
With your three different fabrics fold them right sides together, selvedge to selvedge.  Determine which color you want on which section of the pattern and then place the pattern on the fabric of choice with weights or pins.  Using your rotary cutter cut around the pattern.  For each of the three colors, you will have two mirror pieces for the front and the back of the skirt.

Step 3 – Add Vinyl Embellishments (Optional)
If you have a Cricut Maker and you want to add some iron-on vinyl embellishments click here for a quick tutorial on how to do it.  If not skip and move to Step 4.
Step 4 – Sew Skirt Pieces 
Lay out each of your skirt pieces (top, middle, and bottom) to check that you have them all right side up and the angles are all going in the right directions.  Double check again (or you will have to cut new pieces like I did the first time lol)!!

Layout the top piece right side up, and then lay the middle piece wrong side up over the top piece, lining up the bottom of the top piece with the top of the middle piece, and sew them together with your Janome Overlock/Serger set up with the 4 thread safety stitch.
Now repeat with the bottom piece onto the sewn middle piece.
Repeat with the back piece.  Press the panel seams to neaten them.  Follow the rest of the instructions in the Easy Pencil Skirt Sewing Pattern to finish your side seams, attach the elastic, and you are DONE!

Because you only need a 1/2 yard of each fabric for this project, I recommend starting your search in our pre-cut Half Yards Category.  Below are the 3 fabrics I used in my skirt, and we have colors for all occasions and holidays ::


We hope you enjoy this tutorial! We love to see what you sew up so please tag us on our social media #girlcharlee #girlcharleepencilskirt #janome #janomeartisian.

Happy Sewing & Happy 4th Of July!
~ Heather

November 26, 2019

Girl Charlee Fabrics :: Black Friday 2019 Sale

The Girl Charlee Fabrics Black Friday Sale is on Wednesday, November 27nd - Sunday, December 1st! This year we are mixing it up with both new clearance fabrics AND discounted BRAND NEW ARRIVAL knits added each morning at 12:00 AM PT.  All fabrics in the sale section are discounted for that day ONLY, so shop each day to score amazing deals!

If you want to shop each day please leave a comment with your order that you want us to hold it and we are happy to combine all your orders for one shipping rate when you are done and refund back to you any shipping overage you have paid.  We have negotiated amazingly low rates with our preferred shipping carrier FedEx and shipping starts at just $8.45 for Ground Home Delivery.  We are no longer utilizing the economy FedEx Smart Post service which adds additional delivery time due to final delivery by USPS, so your orders will now get to you faster!

Here is how combined shipping it works:
We are giving our employees Thanksgiving and Friday off to be with their families and friends, so please note that our warehouse and customer service will both be closed with operations resuming on Saturday, November 30th.

Helpful information about our Black Friday Sales:
  • We have extremely heavy volumes as every fabric is cut to order, so please expect additional processing time for your orders to ship once your last order is placed.
  • We are not able to add any fabrics to orders so please place an additional order for any items you wish to add as we will combine them if you leave us a comment.
  • Coupon codes are not applicable to sale items. 
  • If you wish for your order to be held and combined, please leave a comment noting that you want it held, and if not it will be shipped as soon as possible.
  • If you require your order to be processed and ship quickly please add a comment to your order and if you order increments of 30 yards or more as it will ship on a roll and allows us to process it more quickly.
With huge savings on clearance and new arrivals each day these fabrics are sure to sell fast! Shop early and shop each day so you don't miss out on these once a year deals from Girl Charlee Fabrics!

Happy sewing!
~ Heather & The Girl Charlee Team